The JBL Flip 4 speaker comes with 6 buttons, 1 battery indicator, and 2 ports. You should know the purpose of these buttons and ports.
The JBL Flip 4 also comes with button combinations that help you adjust and change modes. You can reset the speaker, disable low-frequency mode, or find the firmware version just by combining two buttons.
Down below you will find all the buttons listed, their purpose, and how you can combine the buttons for different purposes. Don’t miss it.
JBL Flip 4 Buttons Explained
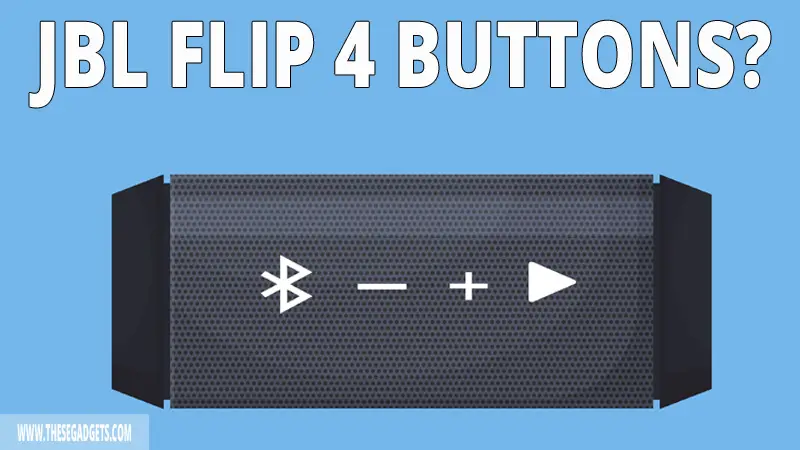
The JBL Flip 4 speaker has 6 different buttons. Each of these buttons has a different purpose. There are 2 rows that have buttons. The first row has 2 buttons, the second row has 4 buttons. Here’s the purpose of all the buttons:
Power Button
The power button is located in the first row of the JBL Flip 4. The power button purpose is to turn the speaker on/off.
If the speaker is off, press the power button one time to turn it on. If the speaker is on, press the button one time to turn it off.
When the speaker is on, the power button will have a steady white light around it. When the speaker is on stand-by, the power button will have a flashing white light around it.
Connect+ Button
Next to the power button, is the Connect+ button. The Connect+ feature allows you to pair up to 100 JBL speakers together and play music from the same source.
To use this feature, connect one speaker to a source (TV, phone, PC) and play music. Then, press the Connect + button one time to allow other speakers to connect to you. Now, press the Connect+ button on other JBL speakers you want to pair, after a few seconds the same music will be played from all connected speakers.
When the Connect+ is activated, the button will have a steady white light. Also, Connect+ is only compatible with Connect+ JBL Speaker, and not with Connect or PartyBoost speakers.
Battery Indicator & Charging Port
The battery indicator isn’t a button, but you should know how to read it. The battery indicator comes with 5 small LED lights. Each of these LED lights indicates 20% of charge.
If the JBL Flip 4 speaker is fully charged, you will see 5 LED lights lighten up. If you see only 3 lighten up LED Lights, the battery is at 60%, and so on. If the first LED is flashing a red light, the battery is low and needs charging.
In the first row, there’s also the charging and aux port. To charge the JBL Flip 4 speaker, plug the USB-C charger into the port, then connect the other end of the charger into a wall charger.
The aux port is used to connect the speaker with another device using an aux cable. Just plug one end of the cable into the speaker and the other end into the other device.
Play/Pause Button
The Play/Pause button is located in the second row. The main purpose of this button is to play or pause the music. If the music is playing, press the button one time and the music will be paused.
This button doesn’t mute the music, instead, it pauses it so you don’t miss anything. Except for the speaker, this button also pauses the music in the device that it’s connected to the speaker.
If the music is paused, press the Play button one time, and the music will resume. If you press the Play/Pause button two times, the music will skip forward 10 seconds.
You can also accept calls using the Play button. If you get a call into your phone while connected to JBL Flip 4 speaker, you can press the Play button one time to answer the call. The JBL Flip 4 comes with an in-built microphone that you can use to speak with the caller.
You can activate Siri or Google Now on your phone using the JBL Flip 4 Play button. Download the JBL Connect app, and make the “Play” button the activation key of the voice assistant. Then, press and hold the Play button for the voice assistant to be activated, and use the in-built microphone to give commands. For this to work, Siri or Google Now assistance should be activated on your phone beforehand.
Volume Up/Down Buttons
The Volume Up and Down buttons are in the shape of Plus (+) and Minus (-). The main purpose of these buttons is to increase or decrease the volume output.
Press the Volume Up (+) button to increase the volume output, and press the Volume Down (-) to decrease the volume output.
These two buttons are only useful when the speaker is connected to a source and the music is playing. If the speaker is idle, these two buttons are useless.
Bluetooth Pairing Button
The Bluetooth button is located in the second row, near the Volume Down (-) button. The main purpose of the Bluetooth button is to put the speaker into pairing mode. Press the Bluetooth button one time to activate the pairing mode.
The pairing mode makes the speaker available to connect with other sources via Bluetooth. The power button will have a flashing blue light when the speaker is on pairing mode. When the speaker is connected with another source, the power button will have a steady blue light.
If you want to disconnect the speaker from the source, press the Bluetooth button one time and the pairing mode will be deactivated.
JBL Flip 4 Button Codes and Combinations Explained
The JBL Flip 4 comes with different button combinations. The combination is activated if you press and hold two buttons at the same time. Here are all button combinations that you can use:
Reset JBL Flip 4
If you want to erase all the previously connected devices and restore the speaker into its default settings, you should reset it. To reset a JBL Flip 4:
- Power on
- Press and hold the Play and Volume Up (+) buttons at the same time.
- Release the buttons when the speaker turns off.
- Press the power button one time.
- The speaker will now power up in its default settings.
Firmware Version
To know the firmware and Bluetooth version of the speaker, press and hold the Connect+ and Volume Down (-) buttons at the same time for 10 seconds.
The speaker will play a prerecorded voice that will tell you the firmware and Bluetooth version of your speaker.
Low-Frequency Mode
The JBL Flip 4 speaker comes with the low-frequency mode that adds the speaker extra bass. By default, the low-frequency mode is always activated.
You can enable and disable low-frequently mode by using a button combination. Press and hold the Bluetooth and Volume Down (-) buttons at the same time for 10 seconds. Release the buttons once the power and Bluetooth buttons light up white.
Note: The Low-Frequency is also a safety mode. Disabling it can damage your JBL Speaker.
Service/Lock Mode
If the JBL Flip 4 speaker is on service mode (or demo mode), the speaker won’t turn ON or OFF unless connected to a charger. The speaker buttons won’t work in this mode, and the speaker will automatically turn on/off once connected to a power charger.
To put the speaker into service mode, press and hold the Connect+ and Volume Up (+) buttons until the speaker turns off.
To deactivate the service mode in JBL Flip 4, connect the speaker to a charger, then press and hold the Connect+ and Volume Up (+) buttons until the speaker turns ON or OFF. You can’t exit this mode unless the speaker is connected to a charger.
Final Words
It’s important to know the purpose of each button. Knowing the button codes is also important as they help you to reset and change the mode without using the phone app.